September 25, 2012

Incredibly Creamy Chocolate (or Carob!) Pie


After making a Creamy Carob Pie, and finding out that it was not the pie I remembered from my childhood, I went straight to the source.  I emailed Aunt Sue and asked her if she still had the recipe.  She quickly responded with not only the recipe, but also a scan of the card she uses.  Thank you, Aunt Sue!


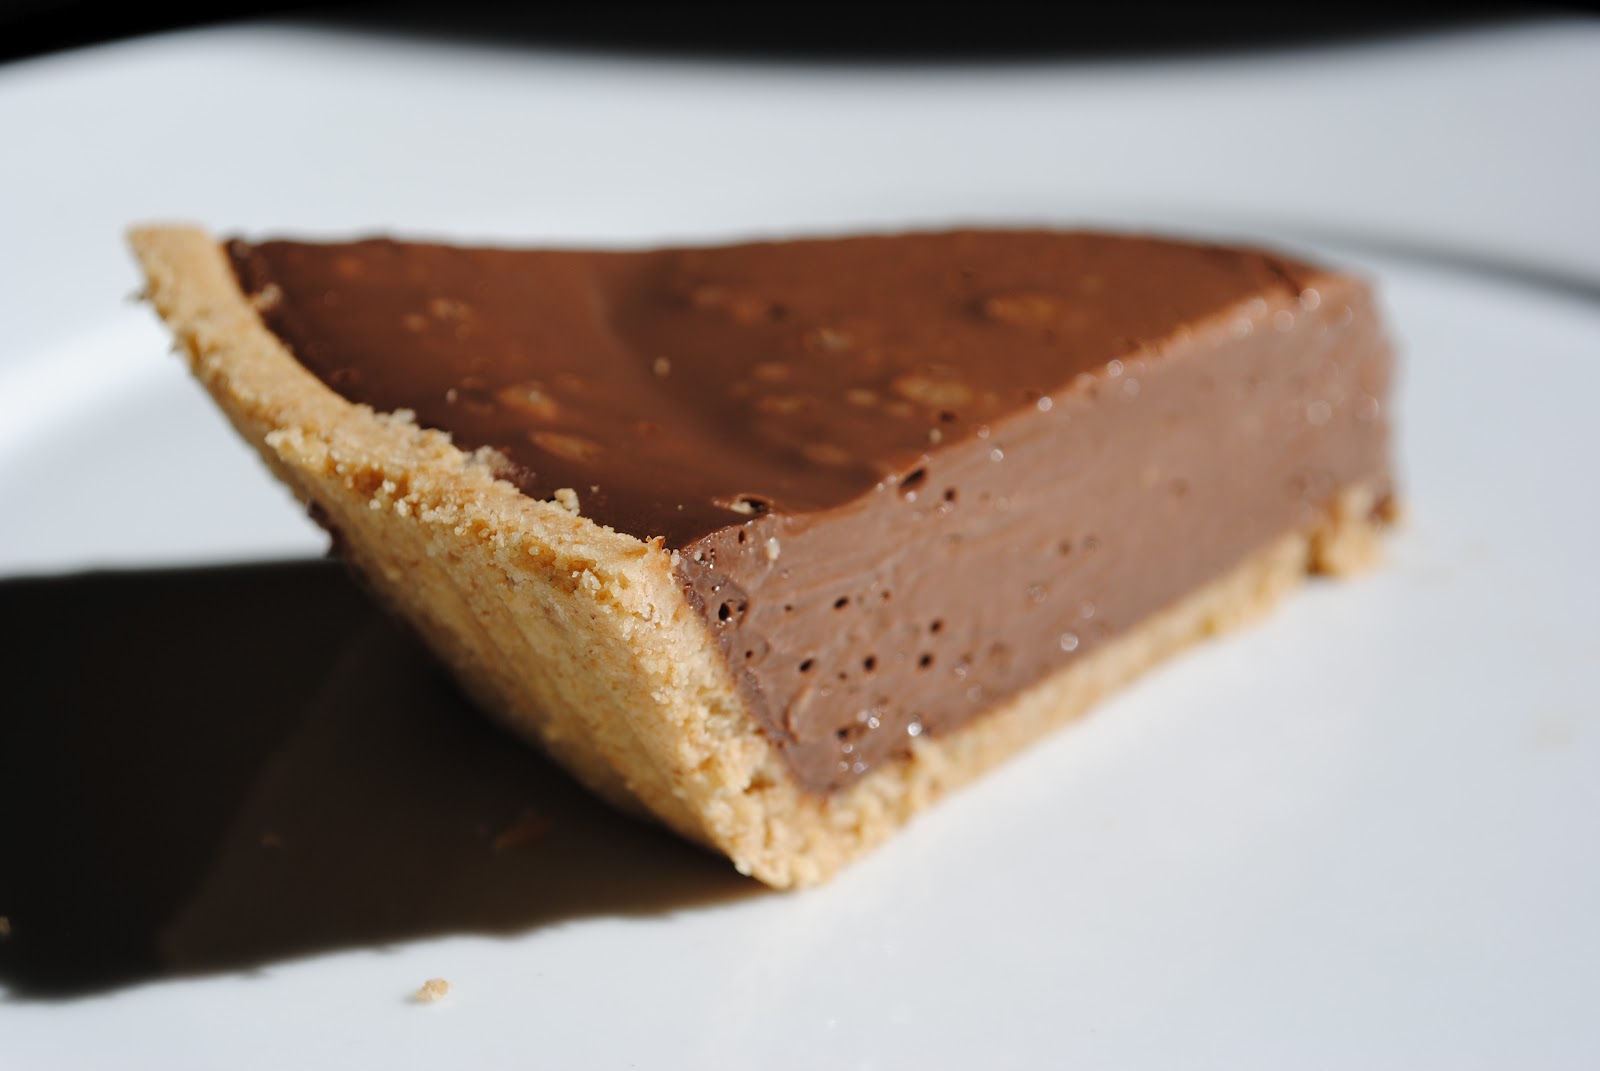
My memories of this pie are of a graham cracker crust with a carob filling instead of chocolate, so that's what I made.  The pie couldn't be simpler.  With only three ingredients (not including the pie crust), it comes together in an instant.  The hardest part is waiting overnight to eat it.

This is a pie for carob lovers.  Mildly sweet, smooth and creamy, the carob is obviously the star of the show.  Even though carob can be used as a substitute for chocolate, it really has a flavor all it's own; with an almost coffee-like quality to it.  In my opinion, the authors of this recipe should have embraced the carob and called it 'Incredibly Creamy Carob Pie!'

Incredibly Creamy Chocolate (or Carob!) Pie

Filling
12 oz chocolate or carob chips
21 oz silken tofu (firm)
3 tablespoons light honey

9 inch graham cracker or cookie crust pie shell

Heat chips in a double boiler or pan sitting in water until smooth.  Add honey.  In a blender or food processor, blend tofu until smooth.  Add the carob/honey mixture and whip until creamy.  Pour filling into pie crust.  Chill over night.  Slice and serve.

September 13, 2012

Creamy Carob Pie


When I was a child, I remember my Aunt Sue making a carob pie.  I was always excited to open the refrigerator door to see the silky smooth pie sitting on the shelf.  When I found this recipe for Creamy Carob Pie, I thought that I found her recipe, and I was excited to try it.  As it turns out, this isn't the recipe she used, I could tell after the first bite.  Still, it was a fun exploration into carob tofu goodness.

Unfortunately, this recipe is not complete.  The instructions for the crust never made it to the back of the card, unless the crust consists of just two cups of crushed graham crackers.  Upon making the pie, I opted not to use the shredded coconut, carob chips, or chopped nuts, because I don't remember Aunt Sue's having those toppings.  Two teaspoons of ground cinnamon seemed like a bit much to me, too, so I used a little less.

One thing I should have done differently, even though the recipe told me otherwise, was to bake the pie crust before filling.  This resulted is a soggy crust from the get go, which only got worse as the pie sat in the refrigerator.  I also used silken tofu as my tofu of choice, since the recipe did not specify.  Overall, though, the pie was simple to assemble, and was ready in no time.

The flavor of the pie was very good, and there wasn't too much cinnamon, as I had feared.  The cinnamon gave the pie a nice subtle spice and the carob flavor was in the forefront, as would be suspected.  There was a fine grittiness in the pie, though.  I don't know if it was a result of the carob powder or the amount of cinnamon; and it took away from the sumptuous smoothness that the tofu brought to the party.  I found myself wondering if the coconut, carob chips, and nuts that I omitted would have hidden the grit by adding other textures to the pie.

Even if this recipe wasn't a complete success, I did end up with Aunt Sue's recipe for her carob pie.  Until next time, my friends!


Creamy Carob Pie

1 1/2 pounds tofu
1/2 cup honey
1/2 cup sifted carob powder
2 teaspoons ground cinnamon
2 teaspoons vanilla extract
Shredded coconut (optional)
Carob chips
Chopped nuts

Blend ingredients until very smooth.  Pour into unbaked pie shell and bake at 425 degrees about 15 minutes.  Remove, sprinkle top with carob chips, nuts and coconut. 

September 4, 2012

Drew's Onion Dill Bread

 
There were three different handwritten recipes for this bread, and only one of them had the directions. It made me wonder if this bread was made so much that only the ingredients needed to be listed. I'm not sure, but after tasting this bread, I wouldn't be surprised if it was made all the time.

The name of the recipe was also a curiosity. Who is Drew? Why does he have his name associated with an onion dill bread? A quick Internet search for 'Drew's onion dill bread' yielded results for 'Drew's Famous Onion Dill Bread'. Maybe this recipe was written before the bread became famous.

As for who Drew is, one of the recipes I found listed the author of the recipe as Drew Alan Kaplan. Drew Alan Kaplan was the owner of DAK Industries. DAK Industries was founded in 1966 and became a mail-order electronics firm in the 1980's. DAK Industries brought a number of electronic gadgets to the attentionof the US market, including an early ... (wait for it) ... bread machine!  My best guess is that this was one of the recipes that was recommended for use in the bread machine.

I don't have a bread machine, and the recipe instructions don't allude to using a bread machine for baking. Perhaps that is why there are two recipe cards without instructions. It was a fun little investigation, though, and I am glad I have some of my questions answered.

As for making the bread, the one ingredient that interested me the most was cottage cheese. I have not used cottage cheese in baking, let alone in bread, but it was not noticeable at all in the finished product. There were no little white curds sprinkled throughout the interior, which was a good thing.

The bread was a bit time consuming to make with the sauteed onions, but it was well worth it.  The bread was incredibly light and soft.  The onion and the dill seed added a nice spice to counter the delicate sweetness of the honey.  The bread was delicious warm from the oven, and I also liked it lightly toasted with a little butter.  It definitely earned the moniker of 'famous'.


Drew's Onion Dill Bread

In large bowl
1/2 cup warm water
2 packages (2 1/2 tablespoons) yeast
4/12 cup flour
In medium bowl
2 eggs, beaten
1 cup cottage cheese
1 cup sour cream
4 tablespoons honey
4 tablespoons minced onion, sauteed and cooled
2 tablespoons melted butter
2 tablespoons dill seed
1/2 teaspoon baking soda
1/2 teaspoon salt
Dash of onion salt (optional)
Start yeast action with a little honey.  Add contents of medium bowl to water and yeast before adding flour.  Knead 5 minutes.  Let rise 30 minutes in covered bowl.  Punch down.  Put on lightly floured board.  Divide in half.  Roll out on lightly floured board and shape into 2 loaves.  Put in pans, cover and let rise (about 30 minutes).  Brush tops with melted butter. 
Bake 20 minutes at 350 degrees and 5 more minutes at 325 degrees.  Turn out on wire rack and cool.

August 25, 2012

Alton Brown's Fudge Cake

 
This is the best chocolate cake I have ever made, and it is my 'go to' chocolate cake recipe.  It comes from Alton Brown's I'm Just Here for More Food, and I think it is one of the first recipes I tried from the book.  I don't even need to look up the page number for the recipe anymore because the book is so worn in that section, I can find it just by shuffling through the pages.
 
Alton Brown says that the cake is so good that it doesn't even need frosting.  While that may be true, the frosting almost steals the show.  He also compares the cake to Hostess Cupcakes.  Yeah, only 1000 times better (I did the math). 
 
The steps to make this cake and frosting (pulverizing chocolate, mixing the frosting over a bowl of ice) are a bit unconventional, but the end result is well worth it.  The cake is, for lack of a better word, meaty, but but not too dense or rich.  The chocolate flavor really shines and there are bits of chocolate speckled throughout that didn't get pulverized as much.  It is not too sweet, and leaves you begging for more.
 
The frosting is light, airy, and full of flavor.  I like to add a pinch of fine sea salt to the mix because I think it really compliments the chocolate.  The frosting is almost the consistency of dense whipped cream only with an intense chocolate flavor, and just melts in your mouth.  I'm not usually a fan of frosting, but this one is just as good as the cake.  Now, if you'll excuse me, I need to go bake a cake...
 

Alton Brown's Fudge Cake
Printable recipe

3 oz unsweetened chocolate
10.75 oz (2 1/4 cups) plain flour
2 teaspoons baking soda
1 teaspoon salt
3 large eggs
1.5 teaspoons vanilla extract
4 oz (1 stick) butter
13.5 oz (2 1/4 cups) brown sugar
8 oz (1 cup) full fat sour cream
8 oz (1 cup) boiling water

Preheat oven to 350 degrees and prepare a 13 x 9 cake pan.

Pulverize chocolate in a food processor until fine, then add the flour, baking soda, and salt, and pulse to combine.  Combine the eggs and vanilla and lightly beat to combine.

In the bowl of a stand mixer or mixing bowl cream the butter and sugar.  Then add the egg and vanilla mixture.  Alternate adding three doses of the chocolate flour mixture and two doses of the sour cream.  Slowly add the boiling water and mix to combine, the batter will be loose.

Bake for 30 minutes at 350 degrees, then 15 minutes at 300 degrees. Internal temperature should reach 175-180F. Cool for 15 minutes, then remove to rack and allow the cake to cool completely before frosting.

Chocolate Frosting
6.5 oz (1 cup) bittersweet or semisweet chocolate
4 oz (1/2 cup) whipping cream
8 oz (2 sticks) butter
10 oz (2 1/2 cups) powdered sugar
Bowl of ice

Melt butter, chocolate and cream in a saucepan (preferably with curved edges) over medium heat, stirring until smooth. Remove from heat and beat in the powdered sugar with a hand mixer.  Once the sugar is dissolved, place the pan into a bowl of ice.  Continue to beat until the frosting lightens and holds its shape.

August 13, 2012

Cherry Pie


Sometimes the simplest recipes are also the tastiest.  With only four ingredients, this cherry pie filling is sensational.  Cherries have been on sale recently, and they looked so good, I couldn't pass them up.  With a bag full of cherries at my disposal, I immediately went to this recipe.

The most tedious part was removing the pits from all the cherries.  But once that was done, the rest of it was easy as pie.  Literally!  I changed a couple things on the card by making my own pie crust and I used tapioca flour as the thickening agent.  I also went with a lattice top crust because I am a sucker for that presentation.

The pie was absolutely delicious.  The limited ingredients really allowed for the cherries to shine.  They were tart, perfectly balanced by the sweetness of the sugar.  It was like canned cherry pie filling only 100 times better (I did the math).  This is what pie is supposed to be. 


Cherry Pie
Printable Recipe

Pie Crust Mix
2 1/2 cups sour, pitted cherries (fresh or canned)
2/3 cup sugar
1 tablespoon flour (or tapioca)
1/8 teaspoon salt

Mix cherries with sugar, flour and salt. If using canned cherries, drain the juice and decrease sugar to 1/3 cup. Pour over unbaked pastry, top with another pastry, bake in hot oven (425) until crust is browned and filling cooked. (About 35 minutes). Be sure to poke holes on top of pastry before baking.

July 25, 2012

Tart Lemon Squares


I knew this recipe had to be good before I even made it.  I have several recipe cards written in Nonna's handwriting in the same format.  Oven temperature in the upper left, pan size in the upper right, a dotted line separating the ingredient columns.  It was like she was just ready to pass out the cards when she made this decadent dessert because she knew people would be asking for the recipe.  It makes me wonder how many cards she wrote like this.

Angela has been making lemon squares for years, and they are one of my favorite sweet treats, but she does not use this recipe.  At every summer family get-together, I always ask her to make them.  My mom also told me that she used this recipe to make lemon squares for Tupperware parties she hosted (along with toffee squares) and they were always a hit.  I was a bit nervous to make them myself, but I really wanted to try my hand at this recipe.

I don't know if the person who first made lemon squares knew what they were doing, or if was just a happy accident, but it always felt like I was doing something wrong when I was making them.  First of all, the bottom crust is so crumbly before pressing it into the bottom of the pan, it doesn't seem like it should hold together at all.  Then, the lemon mixture is so thin, and pouring it onto an already baked crust, it didn't seem like it would set.  When I took the concoction out of the oven, the mixture had set, but the top was a white color that didn't look normal to me.  Wanting to see it through to the end, I sprinkled the top with confectioner's sugar and waited for it to cool.

Thankfully, my fears were unwarranted.  As I cut the squares and pulled out the first sample, it looked just like a lemon square should.  Even better, it tasted good, too!  The soft, tart, custardy topping with the tender buttery crust is a wonderful combination.  It makes it hard to eat just one, so I didn't.  No wonder Nonna had a supply of handwritten lemon square recipes at her disposal.  If she had brought these to a party I was at, I would be the first in line asking her for the recipe.


Tart Lemon Squares 
Printable Recipe

6 tablespoons (3/4 stick) butter
1/4 cup confectioners' sugar
1 cup plus 3 tablespoons flour
3 eggs
1 cup granulated sugar
Grated rind of 1/2 lemon
1/4 cup fresh lemon juice (from 1 large or 2 small lemons)

Combine butter, confectioners' sugar, and one cup of the flour in food processor.  Process until blended.  Pat dough into even layer on bottom of 9-inch square baking pan.  Bake dough at 350 degrees for 15 minutes or until lightly browned. 

Meanwhile, combine eggs, granulated sugar, lemon rind, lemon juice and remaining three tablespoons of flour in food processor.  Process until well mixed.  Pour lemon mixture over hot crust.
Bake at 350 degrees for 15 to 20 minutes longer - until firm.  Cool on rack.  Sprinkle with confectioners' sugar while warm.  Cut in squares when cool. 

July 18, 2012

Easy Zucchini Pie


Zucchini abounds in the summer here in Indiana.  I just finished a piece of zucchini bread, as a matter of fact.  It seems every time I turn around, someone is offering me a zucchini (or 10) from their garden.  Even as the drought and heat wave push on, it seems the zucchini plants have weathered the blow.

So far on Family Tree-Eats, I have posted recipes for zucchini casserole and zucchini bread, and that is about the extent of my zucchini making prowess.  Though grilled zucchini is quite delicious, brushed with a little olive oil, salt, and pepper.  When I saw this recipe for zucchini pie, I knew I had to try it once my zucchini cup began to runneth over.

I made this recipe even easier because I wanted the pie to be green.  I didn't peel the zucchini, nor did I take out the seeds because they were so small in the zucchini I had.  I also didn't boil the zucchini before blending with the other ingredients.  I pretty much ignored the first couple of lines on the recipe card, which didn't hurt the outcome of the pie one bit.

As far as the rest of assembly, it couldn't be easier.  Just blend, pour and bake.  Making the pie crust was the most difficult part.  I had to bake mine for about 35 minutes once I turned the oven down to 350 degrees, but that may have been because I didn't boil the zucchini before baking.

Besides the novelty of being green, this is one of the best pies I have made in a long time.   I sent some home with Julie and some with Angela and within a few hours I had a couple texts asking me for the recipe.  The pie is light, has a nice soft texture, and it delicately sweet.  It is reminiscent of sugar cream pie, but not nearly as rich.  A perfect summer pie.


Easy Zucchini Pie

1 cup zucchini
1 cup sugar
1 cup Milnot milk
1 egg
1 1/2 tablespoon butter
1/4 teaspoon salt
2 tablespoons flour
1 teaspoon vanilla

Peel zucchini and cut into pieces removing seeds and boil until tender.  Put all above in blender and blend well.  Pour into unbaked pie shell.  Sprinkle top of unbaked pie with cinnamon.  Bake at 400 degrees for 5 minutes, then 350 degrees for about 30 minutes or until knife comes out clean.  Do not over bake.  Allow pie to cool completely before serving.

July 10, 2012

Toffee Squares


While talking to my mom about some of the family recipes I got from Nonna, she asked me about this recipe in particular.  I vaguely remember her making them, and she said she made them all the time for Tupperware parties. 
 
This is an interesting recipe.  There are no leavening agents, and it comes together similarly to a crumb topping.  The recipe also states to brush the top of batter with an egg white before baking, which is something I haven't done with a cookie bar before.  These methods paid off and lend the toffee squares a distinctiveness all their own. 

Fans of crumb topping rejoice!  Not only did the batter look like  crumb topping, the finished product also has a very similar flavor, but in bar form.  The egg white gives the toffee squares a nice sheen, as well.  The bars are soft, subtly sweet, the cinnamon adds a comforting spice, while the nuts lend a nice texture.  A winning combination, in my book!


Toffee Squares
Printable Recipe

1 cup soft butter
1 cup sugar
1 teaspoon vanilla extract
1 egg, separated
2 cups flour
1 teaspoon cinnamon
2/3 cup chopped nuts

Cream butter; add sugar, vanilla, and egg yolk; beat until light. Add sifted dry ingredients and half the nuts; mix well. Press into 15 x 10" pan. Brush top with egg white (slightly beaten), and sprinkle with remaining nuts. Bake at 350 for 15-20 minutes. Cut into squares while warm.

June 27, 2012

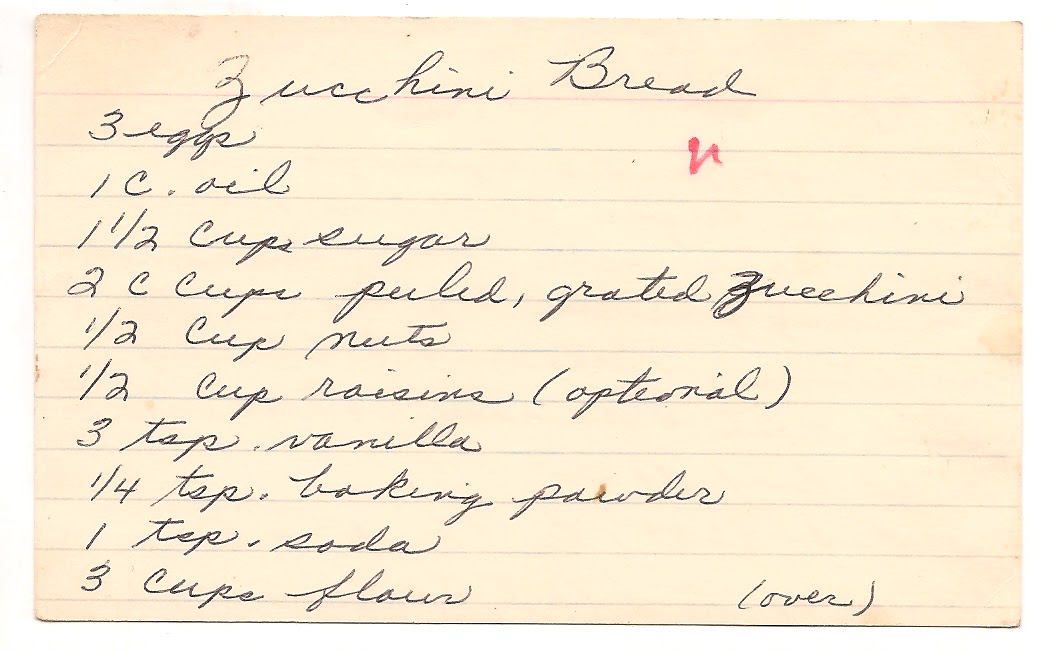
Zucchini Bread


Nothing says summer like garden fresh zucchini.  Well, maybe watermelon, but that's another post.  I have had my own zucchini bread recipe for years, but I decided to try this one to see if it would evoke memories from my childhood.  And boy, did it ever.

Like I mentioned, I have a recipe for zucchini bread that I make once or twice per year, but there was something about making this bread that took me back to the summers of my childhood.  I don't know if it was the look, the smell, or maybe a combination of the two that transported me back.  Even as I was making it, it felt like I had done it before, even though this is the first time I have used this particular recipe.  It's hard to describe, but it was pretty neat.

This bread is not as sweet as the recipe I use, but it is very tasty.  Much like any other quick bread, it is soft and satisfying.  I omitted the nuts and raisins because I didn't have any suitable nuts on hand, and in my opinion, raisins are always optional.  Their absence didn't take away from the appeal of the bread with the delicate flavor of the zucchini complimented by the subtle spice of cinnamon.

I don't know if this version of zucchini bread is better than the one I have used in years past, but it has something the other one doesn't, it takes me back in time.  If I ever want to revisit those magical summer days, I know the vehicle to take me there.


Zucchini Bread
Printable Recipe

Ingredients
3 eggs
1 1/2 cups sugar
2 cups peeled, grated zucchini
1/2 cup nuts
1/2 cup raisins
3 teaspoons vanilla
1/4 teaspoon baking soda
3 cups flour
1 teaspoon salt
2 teaspoons cinnamon

Directions
Beat eggs until light and fluffy.  Add oil, sugar, zucchini and vanilla.  Sift flour, salt soda, cinnamon, and baking powder together.  Add to first mixture.  Mix until blended.  Add nuts and raisins.  Pour into two oiled loaf pans. 
Bake at 325 degrees for 1 hour. 

June 18, 2012

Quick Cherry Crunch


I don't have a lot of recipes that call for cherries, so when I saw this recipe, it moved to the top of my list of things to try.  I am a big fan of cobblers, crunches, crisps, and the like.  Pretty much anything with fruit on the bottom and a sweet topping ranks high on my dessert scale.  This recipe also calls for quick-cooking tapioca, an ingredient I have only before used in Nonna's apple pie, so it is nice to have another application in which to use that ingredient.

Something else that drew me to this recipe is that it looked so simple, and I always like to have deliciously simple dessert recipes at my disposal.  Indeed, it was as simple as it looked and the "quick" in the name was not false advertising.  In no time at all, I had the cherry crunch in the oven and soon the house smelled of sweet oats and cherries.

After taking it out of the oven, I let it cool a bit and then I dug in.  The "crunch" in the name was not false advertising either.  There was a nice sweet crunch on top complimented by the slightly sour soft cherries.  A simple dessert with a lot of flavor.  It could stand to use more cherries, though, in my opinion.  Next time I make it, I may add three cups of cherries.  The way it was, it was kind of like a gooey granola bar, which isn't really a bad thing.  Overall, it is a very tasty dessert.


Quick Cherry Crunch
Printable Recipe

Mix and let stand:
1/2 cup cherry juice
1 1/2 tablespoons quick-cooking tapioca
Melt in large pan:
1/2 cup butter

Mix with it:
1 cup brown sugar
1 cup flour
1 cup oatmeal
1/4 teaspoon baking powder
1/4 teaspoon baking soda
1/4 teaspoon salt
Put half of the mixture in 9 inch square pan. 
Scatter over it:
2 cups sour pitted red cherries and then the tapioca mixture.  Cover with remaining pastry.
Bake 30-35 minutes, until browned.