December 19, 2012

Old-Fashioned Sugar Cookies


Known more as a Christmas staple, we actually made these cookies for the first time around Halloween.  Valerie received a big box of cookie cutters for her birthday, and we were inspired to make cookies in the shapes of ghosts and goblins.

The recipe comes together much like a standard cookie recipe.  I can't stress chilling the dough enough, as it is quite sticky prior to putting it in the refrigerator.  I worked in batches, rolling out a portion of the dough while leaving the rest to keep on chilling.  The dough warms up and becomes sticky again the more it is worked, so swiftness is key.

The end result is worth it though; these cookies are delightful.  Light, chewy, sweet, with a slight crunch around the edges, they really are a treat.  The sour cream gives the cookies a subtle tang while the nutmeg flavor is a welcome surprise.

They live up to their moniker of 'old-fashioned', too.  Emilie took some cookies to her pre-school and her teacher said they reminded her of the cookies her grandmother made.  Valerie's mom, Julie, also said they were like the cookies her mom made when she was a child.

We sprinkled some with sugar, and put icing on others, and they were delicious either way.  So break out the cookie cutters, and whip up a batch before Christmas!


 Old-Fashioned Sugar Cookies
(Makes About 5 Dozen Cookies)
Printable Recipe

4 1/2 cups sifted all-purpose flour
1 teaspoon salt
1 teaspoon baking soda
1 teaspoon baking powder
1/2 teaspoon nutmeg
1 cup butter
1 1/2 cups granulated sugar
2 eggs
1 cup sour cream
1 1/2 teaspoons vanilla

Sift flour, measure; resift with salt, soda, baking powder and nutmeg.
Cream butter with sugar until fluffy. Add eggs one at a time, beating well after each addition. Add dry ingredients alternately with sour cream, mix until smooth after each addition.
Blend in vanilla.
Wrap in wax paper until firm enough to roll.
Roll on floured board to about 1/4 inch thick, cut with large cookie cutter; place on ungreased baking sheet. Sprinkle with sugar; bake at 375 degrees for 12 minutes, or until brown. Take from baking sheets promptly.

December 7, 2012

Old-Fashioned Sugar Squares


I had some trouble with this recipe.  Not that it was difficult, it was that the end result didn't taste the way I thought it should.  The first time I made it, the squares were bland and unsatisfying.  They weren't really very sweet, either.  They probably would have worked well as a vehicle for something else, like a shortcake with strawberries and cream.  I looked at the ingredients and knew the potential was there for a tasty treat.  The buttermilk should add a little tang, the ginger should add a little kick, so I tried again.

The second time I made this, the squares didn't fare much better.  I sprinkled coarse sugar on top instead of granulated, thinking the change in texture would be a nice touch, along with some extra sweetness.  These bars were a little better, but I was still left wanting more.

I then noticed on one of the handwritten cards, there was the addition of vanilla extract, with almond extract also listed as optional.  Maybe I wasn't the only one who thought the original recipe needed a bit more in the flavor department. 

To my next batch I added just the vanilla extract, plus the addition of salt since I was using unsalted butter.  The results were wonderful.  The squares had much more flavor and were just was I was hoping for all along.  They were soft on the inside, while the sugar topping added a nice little crunch.  Plus, I usually have all these ingredients on hand, so these are a nice simple treat to whip up in a hurry.


Old-Fashioned Sugar Squares
Printable Recipe

1 cup soft butter or margarine
1 1/4 cups sugar, separated
2 eggs
1 teaspoon vanilla extract
1 teaspoon almond extract (optional)
2 cups sifted all-purpose flour
1/4 teaspoon baking soda
1/4 teaspoon salt
1 teaspoon powdered ginger
2 tablespoons buttermilk

Cream butter with one cup sugar. Add eggs and beat until light. Add sifted dry ingredients and buttermilk and mix well. Spread in greased 15 x 10 x 1-inch pan, and sprinkle with remaining 1/4 cup sugar. Bake in hot oven, 400 degrees about 20 minutes. Cool and cut into 24 squares.

November 30, 2012

Loam Cake


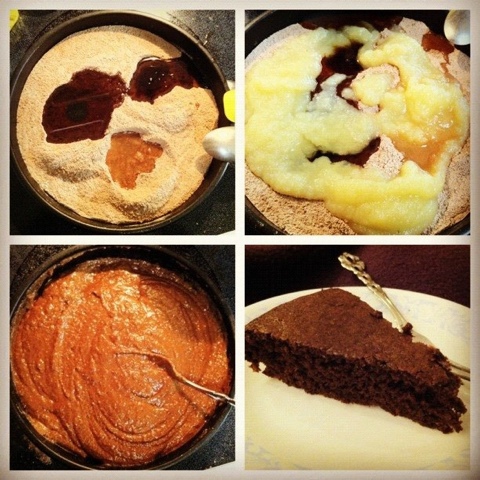
Aunt Sue sent out an email last week asking if anyone had the Loam Cake recipe.  Although I have never made it, I knew I had the recipe simply because of the name.  I rushed over to the laptop, uploaded a picture of the recipe card and sent it off.  I also asked her if there were any Loam Cake stories she would share.
 
Before I got a response from Aunt Sue, I saw that Theresa uploaded a picture of the Loam Cake to facebook.  The picture was so good I asked her if I could use it in this post, and she happily obliged.   
 
Later, I got a response from her.  The Loam Cake was a hit! Seconds all around!  They served it plain, or with a dollop of fresh Whipped Cream - maple syrup flavored.  She and Aunt Joan made this cake in the 1970s in Nonna's kitchen.  The origin of the recipe is unknown.  Loam Cake may have been a late 70s tear-off recipe carried at The Sunspot published by Natural Recipes of Boston (later known as Natural Messages) - calling for Whole Wheat Flour might be a big clue there. Aunt Sue and Uncle Lee also searched the internet and came up empty handed.
 
This post is a true family effort, just what I wanted this blog to be!
 
 
A couple of cooks notes:
Aunt Sue did not have an 8" baking pan, so they used a 9" baking pan - 30 minutes at 350 degrees.
Also, she does not recall ever making the Maple Frosting recipe mentioned on the card, for the Loam Cake or otherwise.
 
Loam Cake
Printable recipe

1 1/2 cup whole wheat flour
1 cup packed brown sugar
3 tablespoons cocoa
1 teaspoon baking soda
5 tablespoons cooking oil
1 tablespoon vinegar
1 teaspoon vanilla
1 cup cold water or applesauce

Mix dry ingredients together or sift directly into an ungreased 8" cake pan. Make three holes in mixture. Pour oil in one hole, vinegar in another and vanilla in third. Pour cold water or applesauce over all. Stir with a fork until evenly blended. Bake at 350 degrees for 35-40 minutes. Serve as is or with maple frosting.

November 7, 2012

Sour Cream Cookies


I'm always excited to find a new cookie recipe, especially on as simple as this.  With ingredients that I normally have in my refrigerator and pantry, these cookies are easy to whip up in a pinch, and they taste good, too!

These cookies are like little pillows.  Delicately light, fluffy, and a little tangy, they have a uniqueness all there own.  The nutmeg adds a nice warmth, too, making it hard to eat just one. 


Sour Cream Cookies
1/3 cup soft butter
1 cup sugar
2 eggs
1/2 cup sour cream
1/4 teaspoon vanilla extract
2 cups flour
1/2 teaspoon baking soda
1/2 teaspoon nutmeg or mace

Blend butter, sugar, eggs, sour cream, and vanilla thoroughly. Stir in flour, soda and spice. Drop by teaspoonfuls on a well greased sheet. Flatten balls by pressing with a wet knife. Bake on top shelf at 400 degrees for 8 minutes.

October 30, 2012

Peanut Butter Cookies


I have tried a number of different peanut butter cookie recipes over the years, never finding one that I would happily make again and again.  The cookies would always turn out too dry or too crumbly, too dense or too crunchy.  I wanted a soft, moist, and chewy cookie where the peanut butter was the star of the show. 

Based on my past experiences with peanut butter cookies, it was with a little hesitation that I tried this family recipe.  The recipe card looked well-loved, so I figured it got a lot of use.  Still, I was not optimistic as I creamed the butter and sugar.  I was feeling a little better when I tried the raw dough, but I knew the proof would be in the finished product.

Still warm from the oven, I took my first bite.  This is the cookie I was looking for!  Or, maybe, rediscovered?  This being a family recipe, maybe I had this cookie as a child and not remembered it, so I always had a preconceived notion of what a peanut butter cookie should be.  Soft, moist, chewy, peanut-buttery and not too sweet.  The perfect little bite, and I will happily make this cookie again and again.


Peanut Butter Cookies
1 1/2 cups flour
1 teaspoon baking soda
1/2 cup butter or shortening
1 cup packed brown sugar
1 beaten egg
1/2 cup peanut butter
1/2 teaspoon vanilla extract
3 tablespoons sesame seeds (optional)

Cream butter and sugar together. Add beaten egg, mix well, then add peanut butter, vanilla and sesame seeds. Add flour and baking soda, blending well.

Roll the dough into walnut-sized balls and place on ungreased cookie sheet. Press them flat with a fork making a cross-hatch pattern. Bake at 375 degrees for 5-7 minutes.

October 23, 2012

Nonna's Apple Pie


Practice makes perfect.  Although I may never make apple pie as good as Nonna did, I'm heading in the right direction.  I documented my trials with this pie on latent chestnut, and I think I have finally made it as well as I possible can.

In the latent chestnut post, I mentioned how a secret to success was using minute tapioca instead on small pearl.  I also found another recipe card that called for 2 teaspoons of ground cinnamon instead of 2 tablespoons.  A huge difference.

Reducing the cinnamon turned out to be the final piece of the puzzle that is Nonna's apple pie recipe.  She didn't make it easy, but I can finally make the pie that takes me back to my childhood.


Apple Pie

Ingredients
5 or 6 medium sour apples, peeled, cored, and sliced
2/3 cups white sugar
2 tablespoons brown sugar
2 tablespoons minute tapioca
2 teaspoons ground cinnamon
1 tablespoon lemon juice (optional)

Directions
Mix all ingredients. Put in unbaked crust-lined pie tin. Dot with butter. Cover with pastry. Make fork holes in pastry. Bake at 425 degrees for 15 minutes, then lower temperature to 350 degrees for 30 minutes more.

Pie Crusts
Printable Recipe

Ingredients
1 1/2 sticks butter
2 cups pastry flour
4 tablespoons cold water (1/4 cup)
Use pastry cutter until flour is crumbly (like corn meal). Add water. Stir well with fork; then with hands; form into two balls, one slightly larger for the top crust. Roll each ball on floured board to fit pie tin. Trim off excess crust with knife.

October 10, 2012

Carrot Cake


This recipe first appeared on latent chestnut on September 2, 2010. 

Taken from latent chestnut:
My old stand-by.  I have been making carrot cake since I was in my early teens and it has always been a hit.  I first started making it for family gatherings, and I remember a conversation I had with my Aunt Joan about how I shredded the carrots.  Not that shredding carrots is some big mystery, but she noted how they were so fine, and weren't really noticeable at all.  Ever since then, I make a point to always shred my carrots by hand on the medium grating blades of my box grater.  Over the years, my recipe hasn't changed much.  I have tweaked my cream cheese frosting recipe a bit, added more cinnamon; and I like to pack in as many shredded carrots as possible to get three cups, since they are the star of the show.

Carrot Cake
Printable Recipe

2 cups all purpose flour
2 cups sugar
1 teaspoon ground cinnamon
1 teaspoon baking powder
1 teaspoon baking soda
1/2 teaspoon salt
3 cups finely shredded carrots (firmly packed)
1 cup cooking oil
4 eggs
1 batch cream cheese frosting (see recipe below)

Preheat oven to 350 degrees. Grease and lightly flour a 13x9 baking dish.

In a large mixing bowl, sift together the flour, sugar, baking powder, baking soda, cinnamon, and salt. In a small mixing bowl, beat together the eggs and oil, then add the shredded carrots and combine.  Next, add the carrot, oil and egg mixture to the dry mix until it just comes together; making sure not to over mix. Pour the batter into the prepared pan and bake in a 350 degree oven for 35 to 40 minutes or until a toothpick comes out clean. Let the cake cool completely before frosting.

Cream Cheese Frosting
8 oz. package Cream Cheese, softened
4 oz. butter, softened
3 1/2 cups powdered sugar
1/2 teaspoon salt
1 teaspoon vanilla

With an electric mixer or stand mixer with paddle attachment, beat together the cream cheese and butter until thoroughly combined and light and fluffy. With the mixer on low speed, add the salt and gradually add 2 cups of the powdered sugar, beating well. Add the vanilla and the gradually add the remaining 1 1/2 cups of powdered sugar.  Once the powdered sugar is combined increase the mixer to high and mix until the frosting reaches spreading consistency.

October 2, 2012

Moo-Less Chocolate Pie


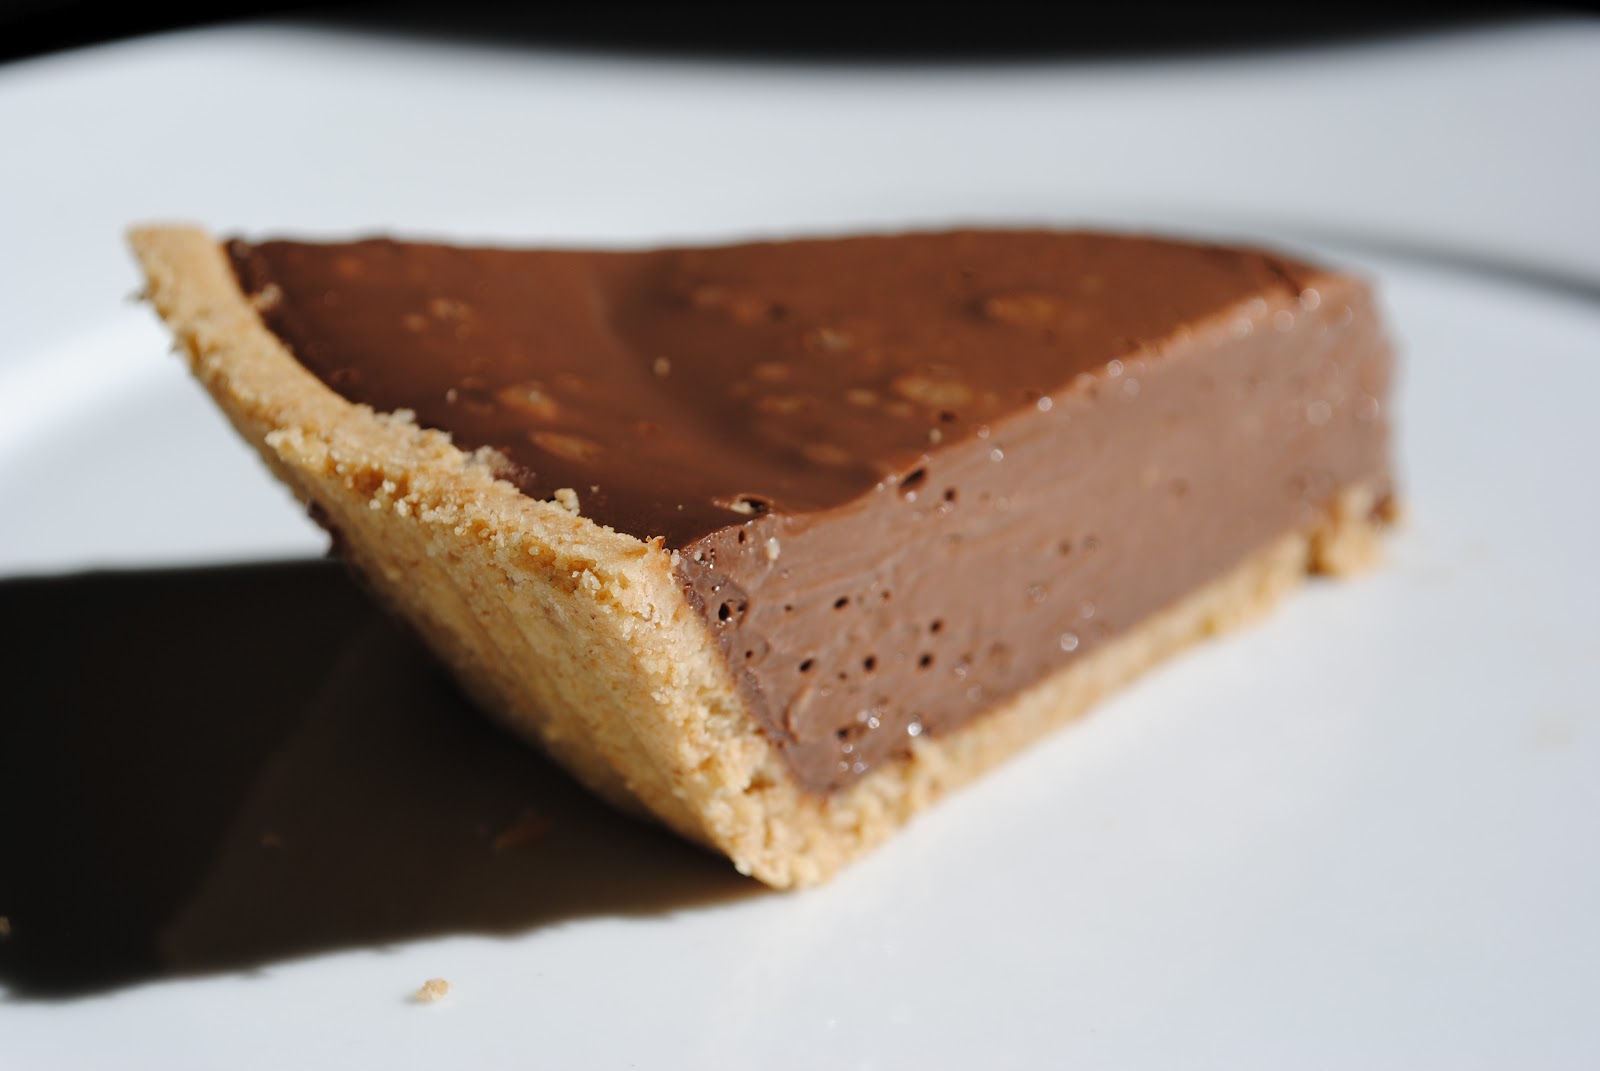
Little did I know, my favorite chocolate pie I have been making for years is eerily similar to Aunt Sue's Incredibly Creamy Chocolate Pie I ate as a kid.  Although I remember her using carob in the filling, and I have only used chocolate to make this pie.  Still, resemblances remain, and I can't get enough of this pie.

This recipe first appeared on the "Tofuworld" episode of Good Eats back in 2001, and it's safe to say I have been making it ever since.  The semi-sweet chocolate chips allow the pie to be rich, while not too sweet, and the coffee liqueur adds a wonderful kick and depth of flavor.  Plus, the simplicity of the recipe makes it that much more appealing.

My one issue with this recipe is that it calls for 13 ounces of chocolate chips.  Seriously?  A standard bag of chocolate chips has 12 ounces.  I'm not going to buy another bag of chocolate chips just for one ounce.  So, I usually just use 12 ounces unless I have extra on hand, and I don't notice a difference.  I know that may sound trivial, but it has been bothering me for 10 years!

I'm glad I didn't let the 13 ounce anomaly stop me.  This pie is delicious as is, or with a little dollop of whipped cream; although, then it wouldn't be 'moo-less'.  Then again, what's wrong with a little 'moo' every once in a while?


Moo-Less Chocolate Pie
Printable recipe

Ingredients
13 ounces semisweet chocolate chips
1/3 cup coffee liqueur
1 teaspoon vanilla extract
1 pound silken tofu, drained
1 tablespoon honey

1 (9-inch) prepared chocolate wafer crust, recipe follows

Directions
Pour 1 inch of water into a saucepan, and bring to a simmer over medium heat. Melt the chocolate chips with the liqueur and vanilla in a medium metal bowl set over the simmering water, stirring often. Combine the chocolate mixture, tofu and honey in a blender and mix until smooth. Pour the filling into the crust and refrigerate overnight.

Chocolate Wafer Crust:
6 1/2 ounces chocolate wafer cookies
1 tablespoon sugar
3 ounces unsalted butter, melted and slightly cooled

Preheat the oven to 350 degrees F. Combine cookies and sugar in a food processor and process until fine crumbs appear. Add the butter, pulsing to combine. Firmly press this mixture evenly into the bottom and up the sides a 9-inch metal pie pan. Bake for 18 to 20 minutes. Remove from the oven and cool completely before filling.

September 25, 2012

Incredibly Creamy Chocolate (or Carob!) Pie


After making a Creamy Carob Pie, and finding out that it was not the pie I remembered from my childhood, I went straight to the source.  I emailed Aunt Sue and asked her if she still had the recipe.  She quickly responded with not only the recipe, but also a scan of the card she uses.  Thank you, Aunt Sue!


My memories of this pie are of a graham cracker crust with a carob filling instead of chocolate, so that's what I made.  The pie couldn't be simpler.  With only three ingredients (not including the pie crust), it comes together in an instant.  The hardest part is waiting overnight to eat it.

This is a pie for carob lovers.  Mildly sweet, smooth and creamy, the carob is obviously the star of the show.  Even though carob can be used as a substitute for chocolate, it really has a flavor all it's own; with an almost coffee-like quality to it.  In my opinion, the authors of this recipe should have embraced the carob and called it 'Incredibly Creamy Carob Pie!'

Incredibly Creamy Chocolate (or Carob!) Pie

Filling
12 oz chocolate or carob chips
21 oz silken tofu (firm)
3 tablespoons light honey

9 inch graham cracker or cookie crust pie shell

Heat chips in a double boiler or pan sitting in water until smooth.  Add honey.  In a blender or food processor, blend tofu until smooth.  Add the carob/honey mixture and whip until creamy.  Pour filling into pie crust.  Chill over night.  Slice and serve.

September 13, 2012

Creamy Carob Pie


When I was a child, I remember my Aunt Sue making a carob pie.  I was always excited to open the refrigerator door to see the silky smooth pie sitting on the shelf.  When I found this recipe for Creamy Carob Pie, I thought that I found her recipe, and I was excited to try it.  As it turns out, this isn't the recipe she used, I could tell after the first bite.  Still, it was a fun exploration into carob tofu goodness.

Unfortunately, this recipe is not complete.  The instructions for the crust never made it to the back of the card, unless the crust consists of just two cups of crushed graham crackers.  Upon making the pie, I opted not to use the shredded coconut, carob chips, or chopped nuts, because I don't remember Aunt Sue's having those toppings.  Two teaspoons of ground cinnamon seemed like a bit much to me, too, so I used a little less.

One thing I should have done differently, even though the recipe told me otherwise, was to bake the pie crust before filling.  This resulted is a soggy crust from the get go, which only got worse as the pie sat in the refrigerator.  I also used silken tofu as my tofu of choice, since the recipe did not specify.  Overall, though, the pie was simple to assemble, and was ready in no time.

The flavor of the pie was very good, and there wasn't too much cinnamon, as I had feared.  The cinnamon gave the pie a nice subtle spice and the carob flavor was in the forefront, as would be suspected.  There was a fine grittiness in the pie, though.  I don't know if it was a result of the carob powder or the amount of cinnamon; and it took away from the sumptuous smoothness that the tofu brought to the party.  I found myself wondering if the coconut, carob chips, and nuts that I omitted would have hidden the grit by adding other textures to the pie.

Even if this recipe wasn't a complete success, I did end up with Aunt Sue's recipe for her carob pie.  Until next time, my friends!


Creamy Carob Pie

1 1/2 pounds tofu
1/2 cup honey
1/2 cup sifted carob powder
2 teaspoons ground cinnamon
2 teaspoons vanilla extract
Shredded coconut (optional)
Carob chips
Chopped nuts

Blend ingredients until very smooth.  Pour into unbaked pie shell and bake at 425 degrees about 15 minutes.  Remove, sprinkle top with carob chips, nuts and coconut.