April 26, 2012

Caramel Cinnamon Muffins


Valerie makes the muffins in our house.  Me and muffin pans don't like each other.  She'll be the first to tell you she doesn't cook, but she can bake muffins with the best of 'em.  When I saw this recipe, I showed it to her and asked her to make them for the family, and she happily obliged.

The ingredients in this recipe are very simple and we had all of them on hand.  The batter comes together easily, but what sets this recipe apart from others is adding brown sugar and butter to each muffin pan before the batter.  This technique reminded me of pineapple upside-down cake where batter is poured directly on a butter, brown sugar mixture.

The recipe calls for the use of 14 muffin pans, but we only did 12 since that is the number of openings our muffin pan has.   So we only needed 6 teaspoons of butter and 12 teaspoons of brown sugar.  We followed the rest of the recipe as written.

The muffins were delicious.  I was a little nervous about them sticking to the pan, but had little issue with it.  There is a slight crunch on the bottom from the sugar caramelizing and the muffins are light and not too sweet.  They did not store well, however, so it is best to eat them fresh.  I don't see that being a problem next time.


Caramel Cinnamon Muffins

Ingredients
6 teaspoons butter
12 teaspoons plus 1/4 cup brown sugar
2 cups cake flour
1 tablespoon baking powder
1/2 teaspoon salt
1 teaspoon cinnamon
1 egg
1 cup milk or 1/2 cup evaporated milk and 1/2 cup water
2 tablespoons melted shortening

Instructions
Grease 12 muffin pans; into each place 1/2 teaspoon butter and 1 teaspoon brown sugar.
Combine flour, baking powder, salt and cinnamon and sift. Beat egg; add milk and melted shortening; add remaining 1/4 cup brown sugar. Add to dry ingredients all at once; stir quickly until just mixed and appears lumpy.
Quickly pour into pans, fill about 2/3 full. Bake in hot oven 425 degrees for 20 minutes or until golden brown. Makes 12 muffins.

April 19, 2012

Hamburger Potato Pie


I've had bags and boxes of family recipes for a long time, and spent several weeks scanning them all into my computer, as I've mentioned before.  The problem was easily accessing the recipes so I really knew what I had and could plan what to make.  It was cumbersome to shuffle through the recipes in the box and it always seemed like I was looking at the same recipes over and over.  The laptop was a little better, but it's bulky and I didn't want to print the recipe I was going to use, and it took up a lot of counter space if I took it into the kitchen with me. 

Enter, the iPad.  I had the idea to transfer all the scanned recipes onto my iPad and it has proven to be most helpful.  It is like carrying around a digital cookbook, and it doesn't take up much more room on the counter than a recipe card would.  Ah, technology.  Since I transferred the images, I have been trying more and more recipes.  Hence, more posts on Family Tree-Eats!

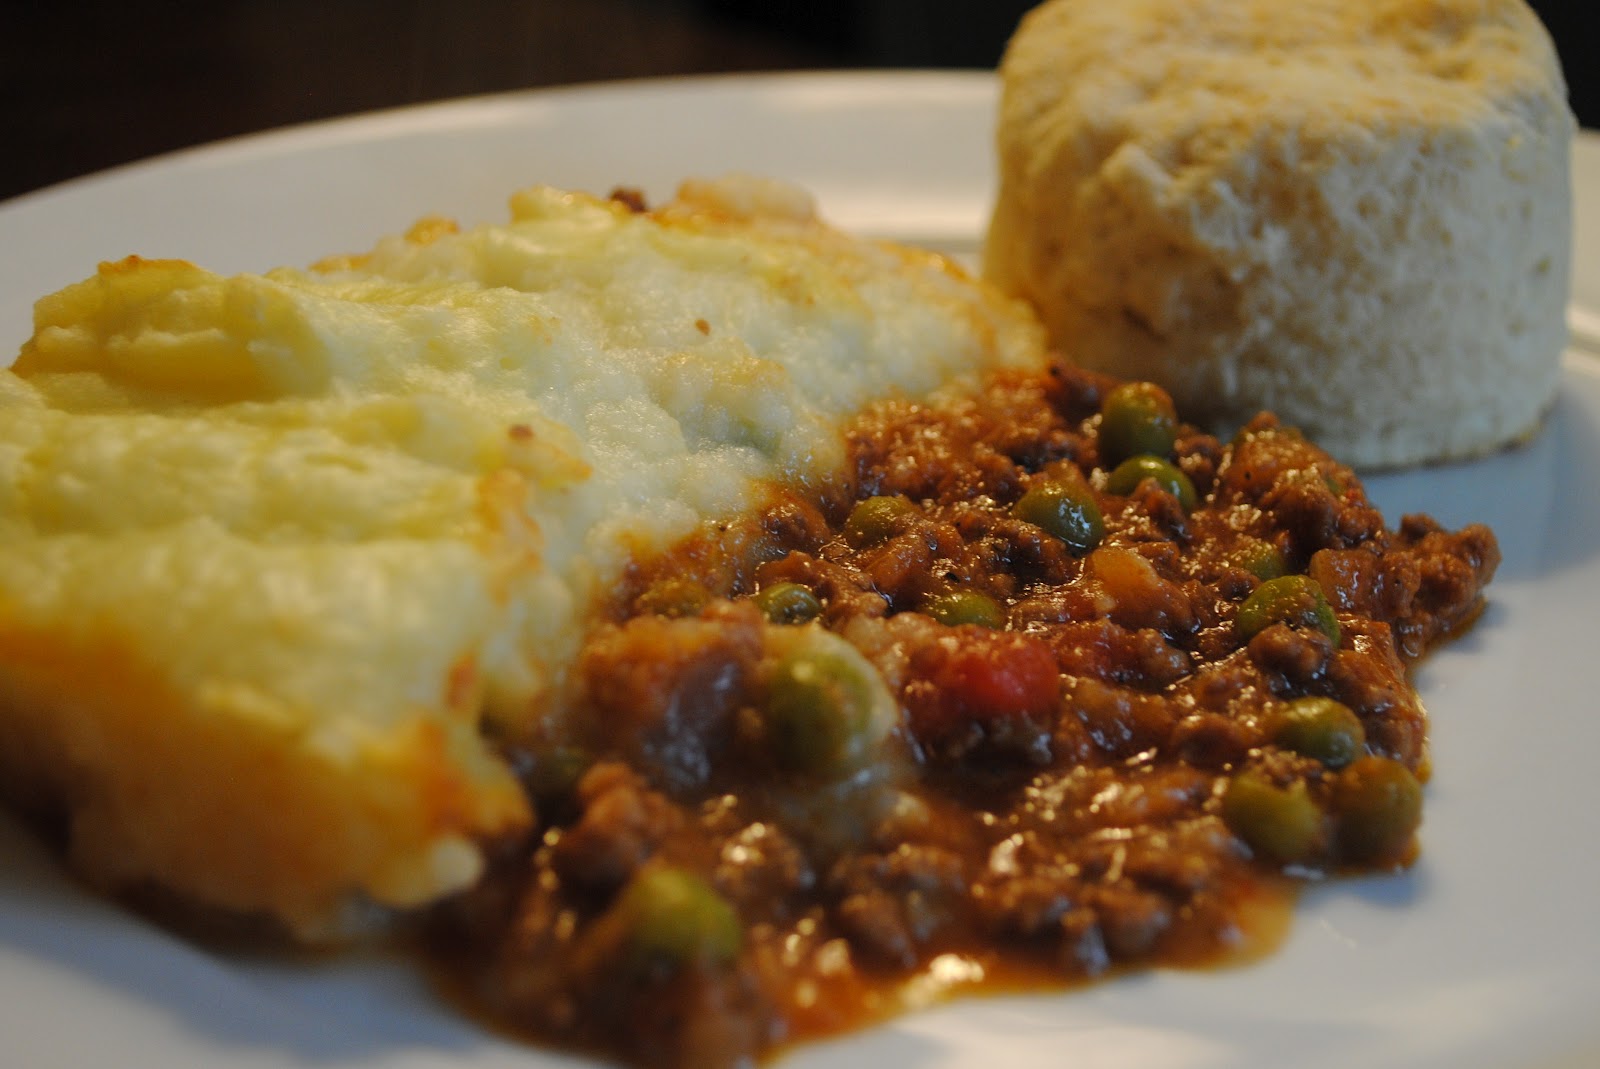
Hamburger Potato Pie caught my eye as a nice dinner option for the family.  It's hard to go wrong with meat and potatoes and this recipe proved that point.  Simple to make and with not a lot of clean up.  It reminded me of cottage pie, with a little bit of a meatloaf flavor.  Very tasty and the leftovers reheated well.  I definitely see this as a recipe to revisit.


Hamburger Potato Pie

Printable Recipe

Ingredients
3/4 cup chopped onion
2 tablespoons butter or margarine
1 1/2 lb. ground beef
1 teaspoon salt
1/2 teaspoon pepper
1 cup cooked, drained peas
1 3/4 cup crushed canned tomatoes
2/3 cup catsup
3 cups hot mashed potatoes
1 egg, beaten

Instructions
Saute onion in butter or margarine. Add meat and seasonings. Cook until meat is browned. Add peas, tomatoes, and catsup. Mix well. Pour into greased casserole (2 quart). Combine mashed potatoes and egg. Spoon mounds of potatoes onto meat mixture. Bake at 350 degrees for 20-30 minutes.

April 13, 2012

Chocolate Pistachio Cake


I first had this cake as a teenager.  I think my mom was reminiscing about recipes from her childhood and she remembered this cake.  She talked about how much she liked it, so much so, that she found the recipe and baked one!  I enjoyed it to, and I baked this cake a few times, myself.  I hadn't made this cake since I moved out of my mom's house, but seeing the recipe again inspired me to make one for my kids.

The recipe is very simple with the inclusion of a box cake mix.  I used yellow cake, since that is what I remember doing in the past, but I'm sure white cake would be delicious as well.  The recipe doesn't specify what size of pudding mix to use, so I just went with the smaller option.  The rest of the recipe is very straightforward, and comes together easily.

I think the most interesting part of the recipe is the chocolate syrup.  It lends a lot of moisture to the cake and gives it a unique chocolaty flavor that isn't found in other cakes I have made.  Since the syrup is only added to a quarter of the batter, is also makes that part of the batter heavier, creating a neat design inside the cake as it is baking.  Plus, the green and brown colors are fun to see visually in a cake.

I do not know the origins of this recipe, but I am glad I have it.  It is moist, delicious, and visually whimsical.  The kids enjoyed it, too, so I see this cake being requested again in the future.


Chocolate Pistachio Cake

Printable Recipe

Ingredients
1 package white or yellow cake mix
Pistachio pudding mix (Royal)
1/2 cup orange juice
1/2 cup water
4 Eggs
1/2 cup oil
3/4 cup chocolate syrup

Directions
Combine all ingredients except the chocolate syrup and mix thoroughly. Pour about 3/4 of the batter into a well-greased and floured bundt pan. Add chocolate syrup to remaining batter. Mix well. Pour over batter in pan.
Bake at 350 degrees for 1 hour. Cool 10 minutes. Remove from pan, cool on wire rack. Sprinkle with powdered sugar.

April 4, 2012

Buttermilk Herb Bread


As I was scanning recipes into my computer, this one was visually the most interesting.  It was folded several times, and seems as if the slightest tug would rip it.  As I was unfolding it some of the inner folds, I found flour that had been trapped in some of the creases.  Needless to say, I had to be very delicate with this piece of paper, and it looks as if it has seen a lot of use.

The bread itself was fairly easy to make, quite reminiscent of pizza dough.  My neighbor gave me access to her herb garden, so I was able to use fresh parley and chives.  I also had an onion on hand, so I chopped some up and added it as well.  The dill seed, though, is what really adds a flavor punch to this bread.

This recipe makes two loaves, and it was the first time I have ever had to braid bread.  I actually have never braided anything, so I enlisted Valerie to teach me.  She braided the first loaf so fast, I didn't have time to see what she did.  On the second loaf, she suddenly forgot how she did the first!  By the time we finally got the second one braided, I was more confused than ever, but at least it was done, and I still don't know how to braid.

The bread is delicious.  Soft and dense, with lots of flavor.  Very good right out of the oven with a little butter.  It also holds up well for a few days after baking, preferably toasted.


Buttermilk Herb Bread
Ingredients
2 packages yeast or 2 1/2 tablespoons powdered
5 - 5 3/4 cups unsifted flour (unbleached)
1/4 cup salad oil
1/2 cup chopped chives or onions
2 tablespoons sugar
2 teaspoons salt
3/4 cup lukewarm water
1 1/4 cup buttermilk (warmed)
1/2 cup chopped parsley or 1/4 cup dried
1 tablespoon dill seed


Instructions
In large mixer bowl dissolve yeast in water, add 2 cups flour, buttermilk, oil, sugar, salt; beat at low speed until moistened. Increase speed to medium, add herbs and mix well. Add 3 1/2 cups flour - knead approximately 5 minutes. Let dough rise in greased bowl for 1 hour.

Grease two long cookie sheets. Punch dough down. Divide in half - then each half into 3 pieces. Roll each piece into a 14 inch long rope - braid 3 pieces into a loaf. Bake in 350 degree oven 35-40 minutes.

Mm mm - Good!

December 24, 2011

Spritz


The memories embedded in these little tree-shaped cookies make them so dear to my heart.  My mom used to make these every Christmas and they were such a treat.  I remember sitting down to watch Rudolph the Red-Nosed Reindeer (back before it was on DVD) and eating these cookies.  It just didn't feel like Christmas until I popped the first spritz cookie into my mouth.

I took on making these cookies myself probably when I was about sixteen.  I used a cookie press with a twist top to extract the cookies.  A couple years later I got a cookie press with a trigger mechanism that uniformly extracted the cookies with a single click.  My cookie production increased dramatically with that in my arsenal.

I still make these cookies every year for Christmas and Ari has become quite the fan.  He even declared it his favorite cookie this year, much to my delight.  He also is strong enough this year to pull the trigger on the cookie press so he was able to help this year. 

Christmas is the only time of year I make spritz cookies, and I think I have only used one other shape besides the tree in my cookie press.  They just carry such a strong connotation to Christmas for me, I have a hard time making them for anything else.

Spritz

Ingredients
1 1/2 cups butter
1 cup sugar
1 teaspoon baking powder
1 egg
3/4 teaspoon almond extract
1/2 teaspoon vanilla extract
3 1/2 cups all purpose flour
5 or 6 drops of green food coloring

Directions
Preheat oven to 375 degrees.  Beat butter and sugar until combines.  Add sugar and baking powder.  Beat in egg, almond extract, vanilla extract.  Add the flour and food coloring and mix until thoroughly integrated.

Place the dough into a cookie press and extract cookies into an ungreased cookie sheet.   Bake for 8 minutes and cool on a wire rack.


December 20, 2011

Snickerdoodles


I tend to make snickerdoodles during the holidays.  I don't know if they are a traditional holiday cookie, but they are easy to make and one batch of dough makes a lot of cookies.  Since we like to give boxes of cookies to our friends and family, these little beauties are a perfect fit.

Snickerdoodles pack a punch in flavor, too.  They are not too sweet, and the cinnamon adds just the right amount of spice.  They have a chewy texture and have just the right amount of crisp around the edges when baked right.

This is another recipe that may have found it's way into our family through the St. Joan of Arc recipe book.  Complete with annotations, this recipe looks like it has had a lot of use.


There was also a typed recipe card in the recipes I sorted through.  This card doesn't take into account the annotations and calls for the cookies to be bakes in a 400 degree oven for 7 minutes.


I have found the cookies bake best at 375 degrees for 8 minutes.  I also use butter instead of shortening and the cookies turn out just fine. 

Snickerdoodles

Ingredients
1 cup butter or shortening
1 1/2 cups sugar
2 eggs
2 3/4 cups flour
1 teaspoon baking soda
2 teaspoons cream of tartar
1/4 teaspoon salt
Cinnamon and sugar to coat

Directions

Mix thoroughly butter or shortening, sugar and eggs.  Sift together and stir in dry ingrdients.  Roll into ball the size of small walnuts.  Roll in mixture of:

2 tablespoons sugar
2 tablespoons cinnamon

Place 2 inches apart on ungreased baking sheets.  Bake until lightly browned, but still soft.  Cookies puff up, then flatten out.  Bake 8 minutes in 375 degree oven.  Makes about 5 dozen.

November 30, 2011

Buttermilk Pie


I know here in Hoosier country sugar cream pie reigns supreme, but this buttermilk pie sure gives it a run for its money.  Smooth, rich, creamy, a little tart, and not too sweet, buttermilk pie does not disappoint.  My Grandma Ruth made this pie when I was a child, though I do not remember it.  The recipe has been in the family for years, and I am so glad to have it now.

My grandma gave it too me when I asked her if she had a good sugar cream pie recipe.  When I asked her, she scoffed a little and told me about her buttermilk pie.  Intrigued, I asked her if I could have it.  She gladly wrote it down, and I soon discovered a new favorite pie.

This pie is super easy to make.  I have modified the ingredient amounts a little to to account for one pie.  Other than that, I haven't changed a thing; nor do I need to. 


Buttermilk Pie

2 eggs
1 1/2 cups sugar
1/2 stick melted butter
1/4 cup flour
1/4 teaspoon vanilla
1 cup buttermilk
1/2 teaspoon lemon juice

Mix everything above real good with electric mixer.  Pour filling into an unbaked 9.5 inch pie shell.  Bake at 450 degrees for 10 minutes, them 300 degrees for 30 to 35 minutes.  Cool completely before serving.

November 23, 2011

Marbled Squares


Mmm.  Mmm.  Good.  As soon as I saw this recipe, I knew I had to make it.  Chocolate chip cookies are a favorite in our house, and this variation sounded too good to pass up.  It apparently was an old family favorite, too, since Nonna submitted it to the Saint Joan of Arc recipe book.


Unfortunately, I was unable to find the date the book was published.  I did find a newspaper clipping taped into the book from 1966, and all the advertisers still used "GL" in their phone numbers. 

I found a few different versions of this recipe.  The recipe book submission (above) had a number of annotations and double amounts of the ingredients written in pencil (notice the dash next to the salt - omitted!). 

I also found a typed recipe card with the doubled ingredients and baking in two eight inch and nine inch square pans instead of nine by thirteen.

Seeing these different versions, I began to wonder where this recipe originated.  Flipping through the Saint Joan of Arc recipe book, taped to the very last page was a Nestle chocolate chip package.


As I examined the package, I saw 'Toll House Marble Squares" in the bottom right corner.  The instructions are as follows:
Prepare dough for 1/2 of Original Toll House Cookies but do not add chocolate morsels.  Spread dough in a greased 13" x 9" x 2" pan.  Sprinkle 1/2 a 12-oz. Jumbo pkg. (1 c.) NESTLE'S SEMI-SWEET CHOCOLATE MORSELS over top.  Place in 375 degree F. oven for 1 min.  Remove from oven and run knife through batter to marbleize.  Return to oven and continue to bake.  BAKE at 375 degrees F. 
TIME:  12 to 14 mins.  Cool.  Cut in 2" squares.
It was fun to track down the origin of this recipe, and they are delicious, indeed.  The middle pieces are much like a whole cookie make out of the gooey chewy middle of a traditional chocolate chip cookie.  Yum!

Marbled Squares

1/2 cup butter, softened
1/2 cup granulated sugar
1/3 cup light brown sugar
1/2 teaspoon vanilla
1/4 teaspoon water
1 egg
1 cup plus 2 tablespoons flour, sifted
1/2 teaspoon baking soda
1/8 teaspoon salt
1/2 cup chopped nuts
1 cup chocolate chips

Preheat oven to 375 degrees.  Sift together flour, baking soda, salt; set aside.  Blend butter, sugar, brown sugar, vanilla, and water until creamy.  Beat in eggs.  Add flour mixture; mix well.  Spread dough in a greased 13 x 9. pan.  Sprinkle chocolate chips over top.  Place in oven for 1 min.  Remove from oven and run knife through batter to marbleize.  Return to oven and continue to bake.  Bake for 12 to 14 mins.  Cool.  Cut into 24 squares.

November 18, 2011

On the omission of salt...

Thanks to my wonderful family, I have amassed a large number of handwritten recipes passed down from generation to generation.  I requested these recipes so I could scan them into my computer in order to preserve their image and share with any and all who may want them.  Three hundred scans later, my project is now complete (until I get more recipes) and I look forward to trying these recipes and sharing the results with you; along with an image of the recipe card, of course. 

In collecting these recipes, there were, in some instances, many versions of the same recipe.  Be it in card form, book form, newspaper clipping, or direct from a package label, it was fun to see the origin and evolution of a recipe as it was transcribed time and time again.  Some recipes were doubled, some had an ingredient tweaked here and there, some were modified drastically, but there was one constant throughout all recipes that were transcribed by Nonna from the original source.  All were written with the omission of salt or with the annotation of "(optional)" after the ingredient.

This was quite intriguing to me, as I often wondered why salt was not included in the ingredients list in most of the family recipes I already had.  More often than not, I found myself adding a little salt to round out the flavor, since that is how I am used to cooking.  I was curious to know if most sweets did not call for salt back when these recipes were printed or if Nonna made a conscious effort to exclude the ingredient when she copied the recipe to the card.  I now have my answer.

I am now curious to know why she excluded salt.  If anyone has any insights, please post away in the comment section.  Stay tuned for more recipes!

August 23, 2011

Zucchini Casserole


I remember following Grandpa into the backyard where a lush green vine climbed the fence and sprawled into the grass.  He would rummage through the leaves and pull out a brilliant green zucchini.  It was like magic.  I always hoped he would take it in for Nonna to make some zucchini bread.  More often than not, though, when Grandpa brought in a zucchini, he was going to make zucchini casserole.

As a kid, I didn't care for zucchini casserole.  However, when I saw the recipe as I was perusing through Nonna and Grandpa's recipe cards, I knew I had to try it again.  With an abundant supply of zucchini at the market, it was the perfect time to make this casserole.

The recipe is quite straightforward and easy to prepare.  The only modification I made was to the cream of chicken soup ingredient.  Instead of using the cream of chicken soup, I made a roux with about two tablespoons of butter and three or four tablespoons of flour.  I then added a cup of chicken stock to the roux, added a little salt and pepper brought the mixture to a boil.  I cooked it until thick, and I had a simply made substitute to the store bought variety.

I followed the rest of the recipe as written, and it was ready to bake in no time.  With the herb stuffing and creamy consistency, the casserole reminded me a lot of something I would serve on Thanksgiving or in the fall.  It is very good, though, and the zucchini adds a nice freshness and a vibrant green color to the dish.  I am thinking about serving it on Thanksgiving in lieu of a traditional stuffing dish, as long as I can find good looking zucchini.

I didn't know what I was missing as a kid, but I am glad I have rediscovered this casserole.  I will not hesitate to use my zucchinis for this dish instead of zucchini bread.  I am sure it will become a staple at our table during the abundant summer zucchini season, just as it was at Nonna and Grandpa's.

Zucchini Casserole

2 lbs. zucchini, sliced
1/4 cup chopped onion
1 cup cream of chicken soup
1 cup sour cream
1 cup shredded carrot
8 oz. herb stuffing mix
1/2 cup butter

Preheat oven to 350 degrees.  In a saucepan, cook zucchini, and chopped onion in boiling water (salted) about 5 minutes.  Drain.  Combine soup and sour cream.  Stir in shredded carrots.  Fold in drained zucchini and onion mix. 

Combine stuffing mix and butter and spread this mixture in the bottom of 12 x 9 baking dish.  Spoon vegetable mixture on top.  Then sprinkle remaining stuffing mixture on that.  Bake for 25-30 minutes or until brown.